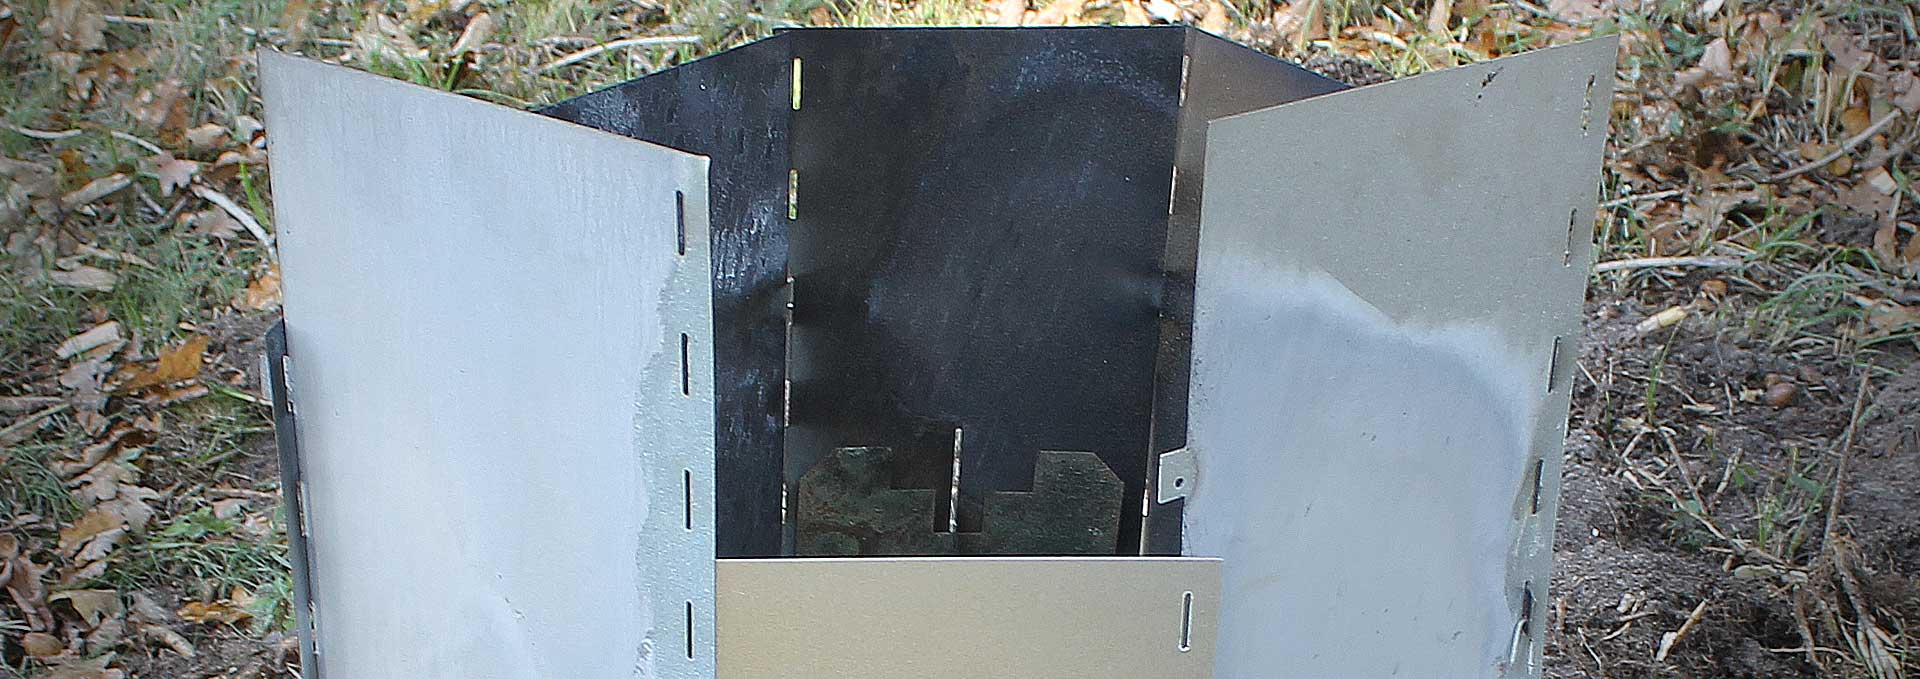
Assembly of the Stump Chimney™
Assemble the Stump Chimney™ is easy. With a simple design, you don’t have to use tools to assemble it. The Stump Chimney is easy to adapt to the shape of different stumps. Follow the steps here or download the manual. See also examples of how different stumps have been removed and descriptions with video and step-by-step pictures.
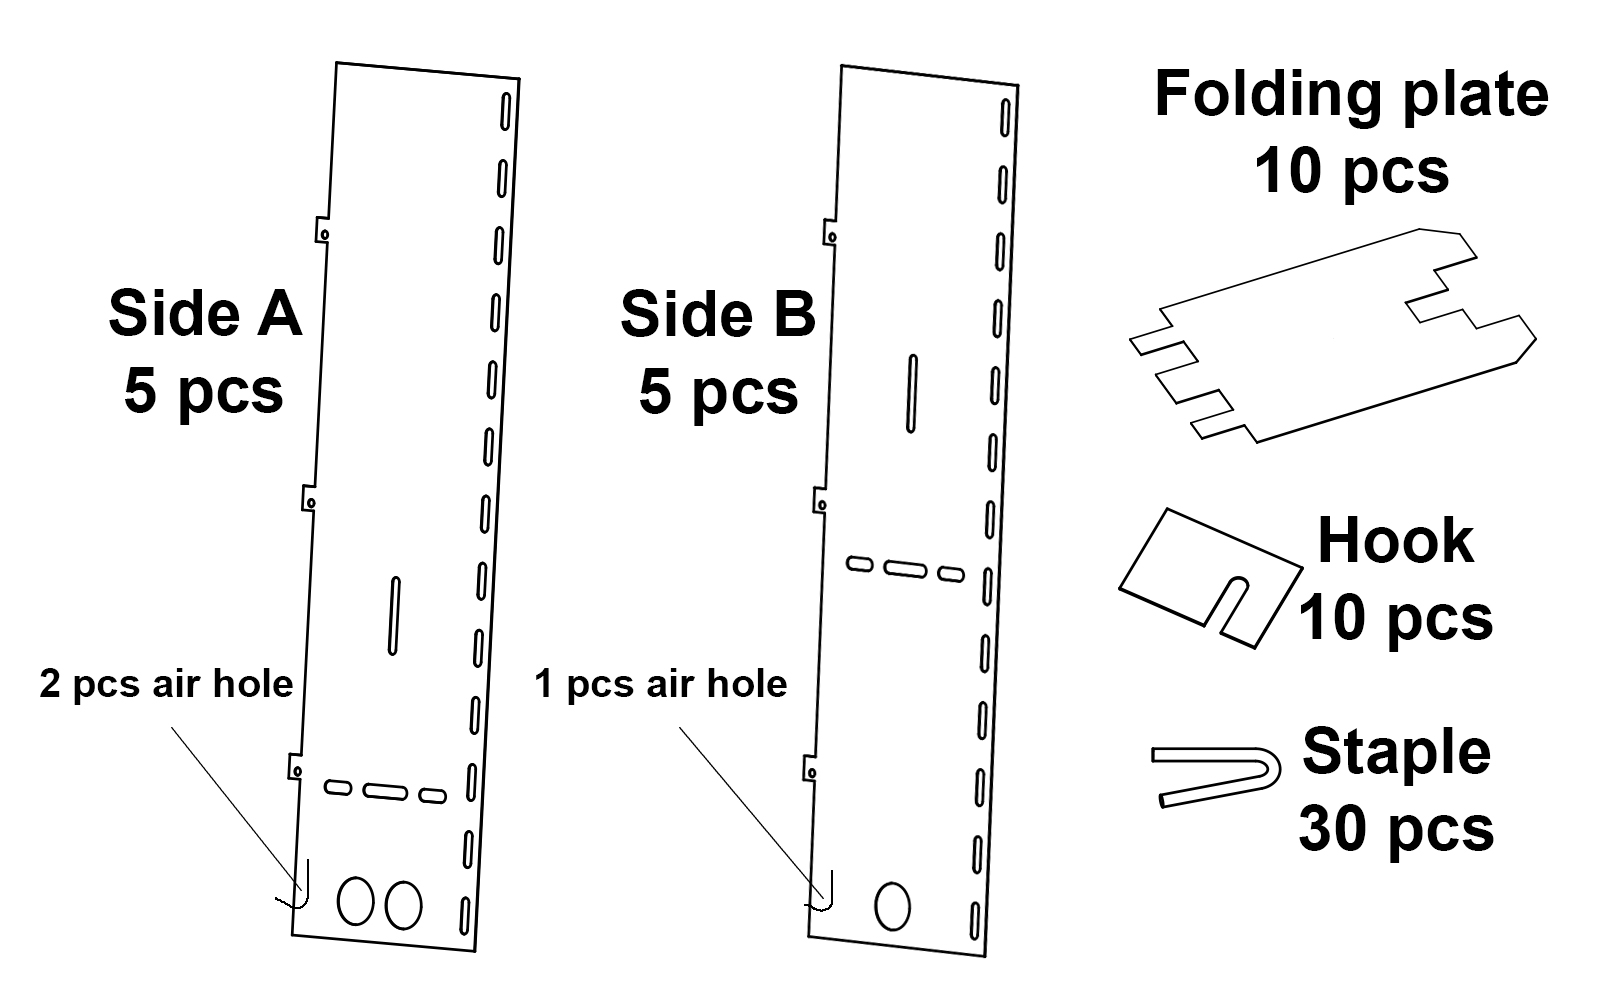
Components
5 pcs A-sides with two air holes in each
5 pcs B-sides with one air hole in each
10 pcs folding plate
10 pcs hook
30 pcs staple
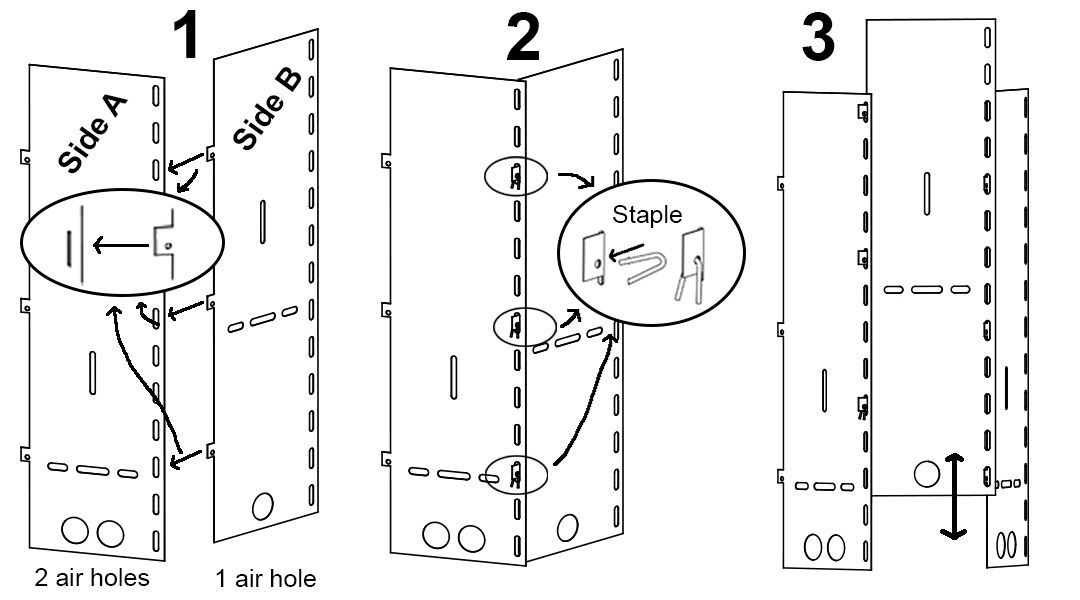
Step 1 – Assemble the sides
- Always start with side A. Insert the tongues of Side B into the slits of Side A. The air holes should always be located on the bottom.
- Insert the staple into the hole on the tongue. Each tongue must be locked with a staple. Then continue to assemble the sides. Alternate between Side A and Side B.
- If the ground is uneven or if there are many roots, one or several sides can be mounted higher up or lower down than the adjacent sides. It is sufficient that two of the three tongues are fastened in a slot.
The number of sides depends on the size and appearance of the stump. The ideal gap between the stump and the Stump Chimney™ is 1 briquette. If the gap is too large, many more briquettes are to be used and less heat is generated around the stump
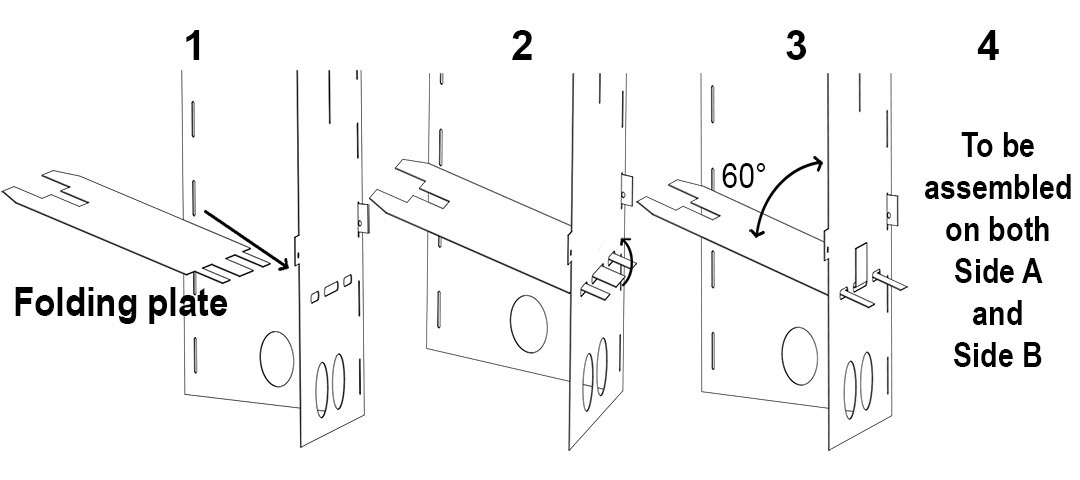
Step 2 – Attach the folding plates
- The folding plate is inserted into the horizontal slots from the inside.
- Bend up the middle tongue on the outside of the chimney.
- The angle of the folding plate should be about 60 degrees when hanging freely.
- Repeat this process until all Side A and Side B have a folding plate attached to it.
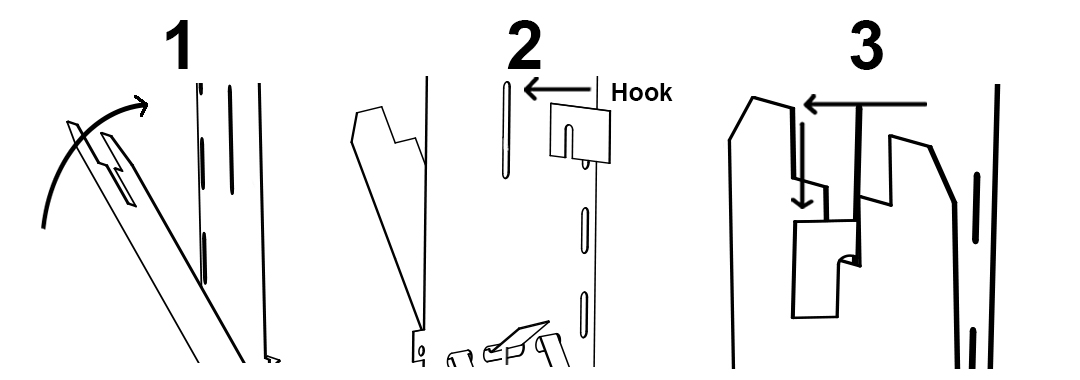
Step 3 – Lock the folding plates in the upright position
- Fold the folding plate on the inside so that it points straight up.
- Insert the Hook from the outside, into the slot above the folding plate attachment.
- Insert the hook until it can be lowered and lock the folding plate.
This is done to make it easier when adjusting the Stump Chimney™ over the stump and when filling in the grill briquettes
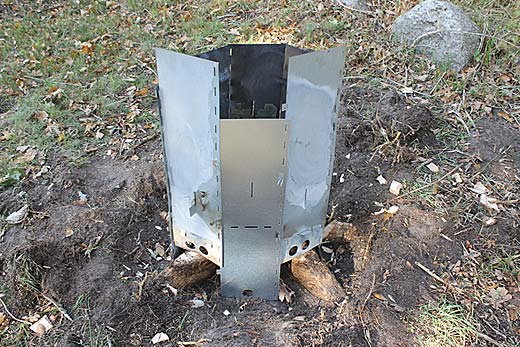
Step 4 – Number of sides for a stump
Below are some guidelines on how many sides of the Stump Chimney™ are needed for a stump. It all depends on what the stump looks like.
Stump Diameter: Number of sides
- 19 cm: 6 sides
19 - 24 cm: 7 sides
24 - 30 cm: 8 sides
30 - 35 cm: 9 sides
35 - 40 cm: 10 sides
40+ cm: See below
Stumps larger than 40 cm can be burnt in 2 different ways.
Use two Stump Chimneys to increase the number of sides. These can be put together and placed around a larger stump. With two Stump Chimneys, the stump can be up to 60 cm in diameter. For large or damp stumps, drilling holes or sawing cuts into it with a chainsaw is much faster and requires less briquettes to burn down the stump
2. Burn it down in stages.
Watch the assembly video
Buy your Stump chimney for only £ 89
